Skip to content
Share
Explore


How it works
The Overview:
Task & Time Tracker:
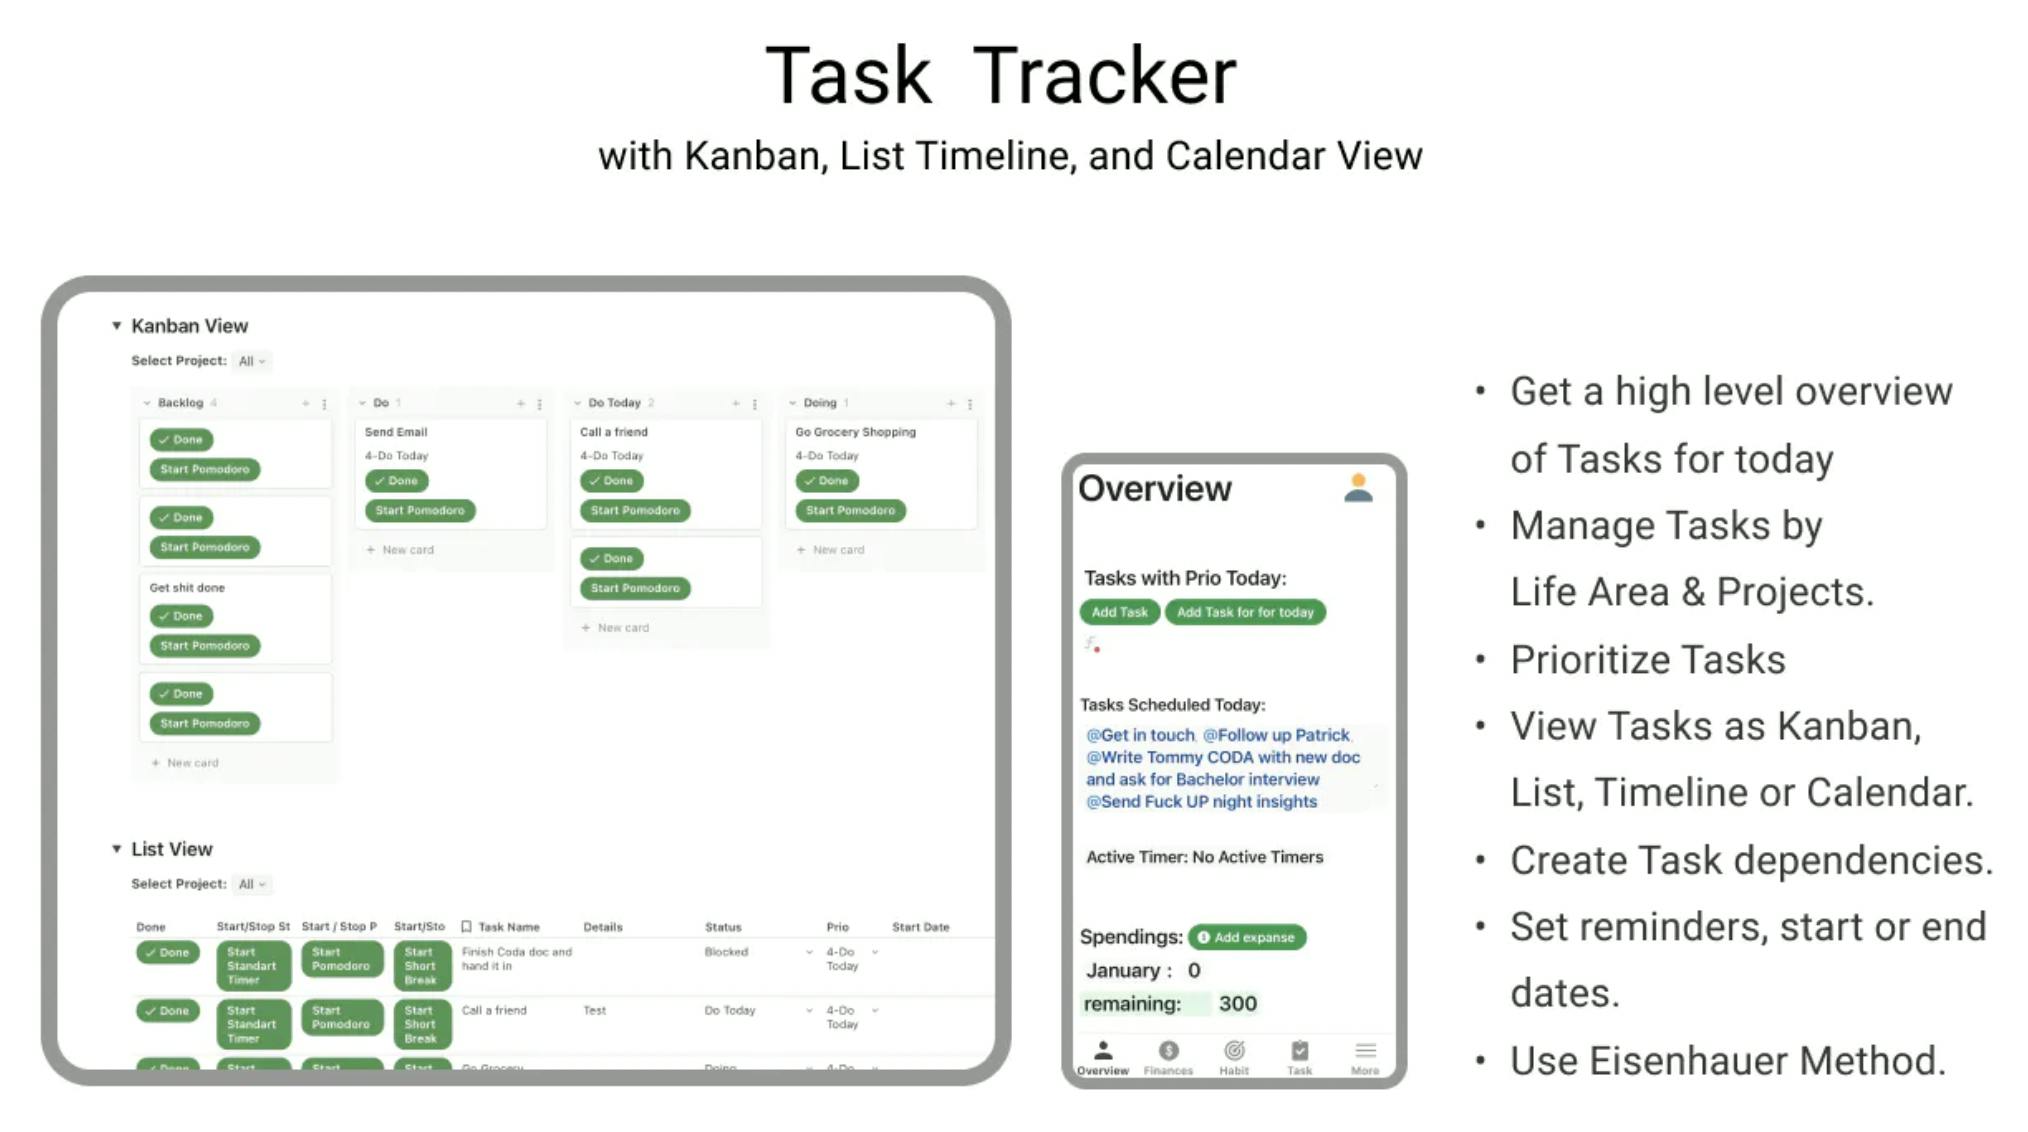
Task Tracker
Different ways to view your work:
Timeline View Calendar View & Scheduled Tasks
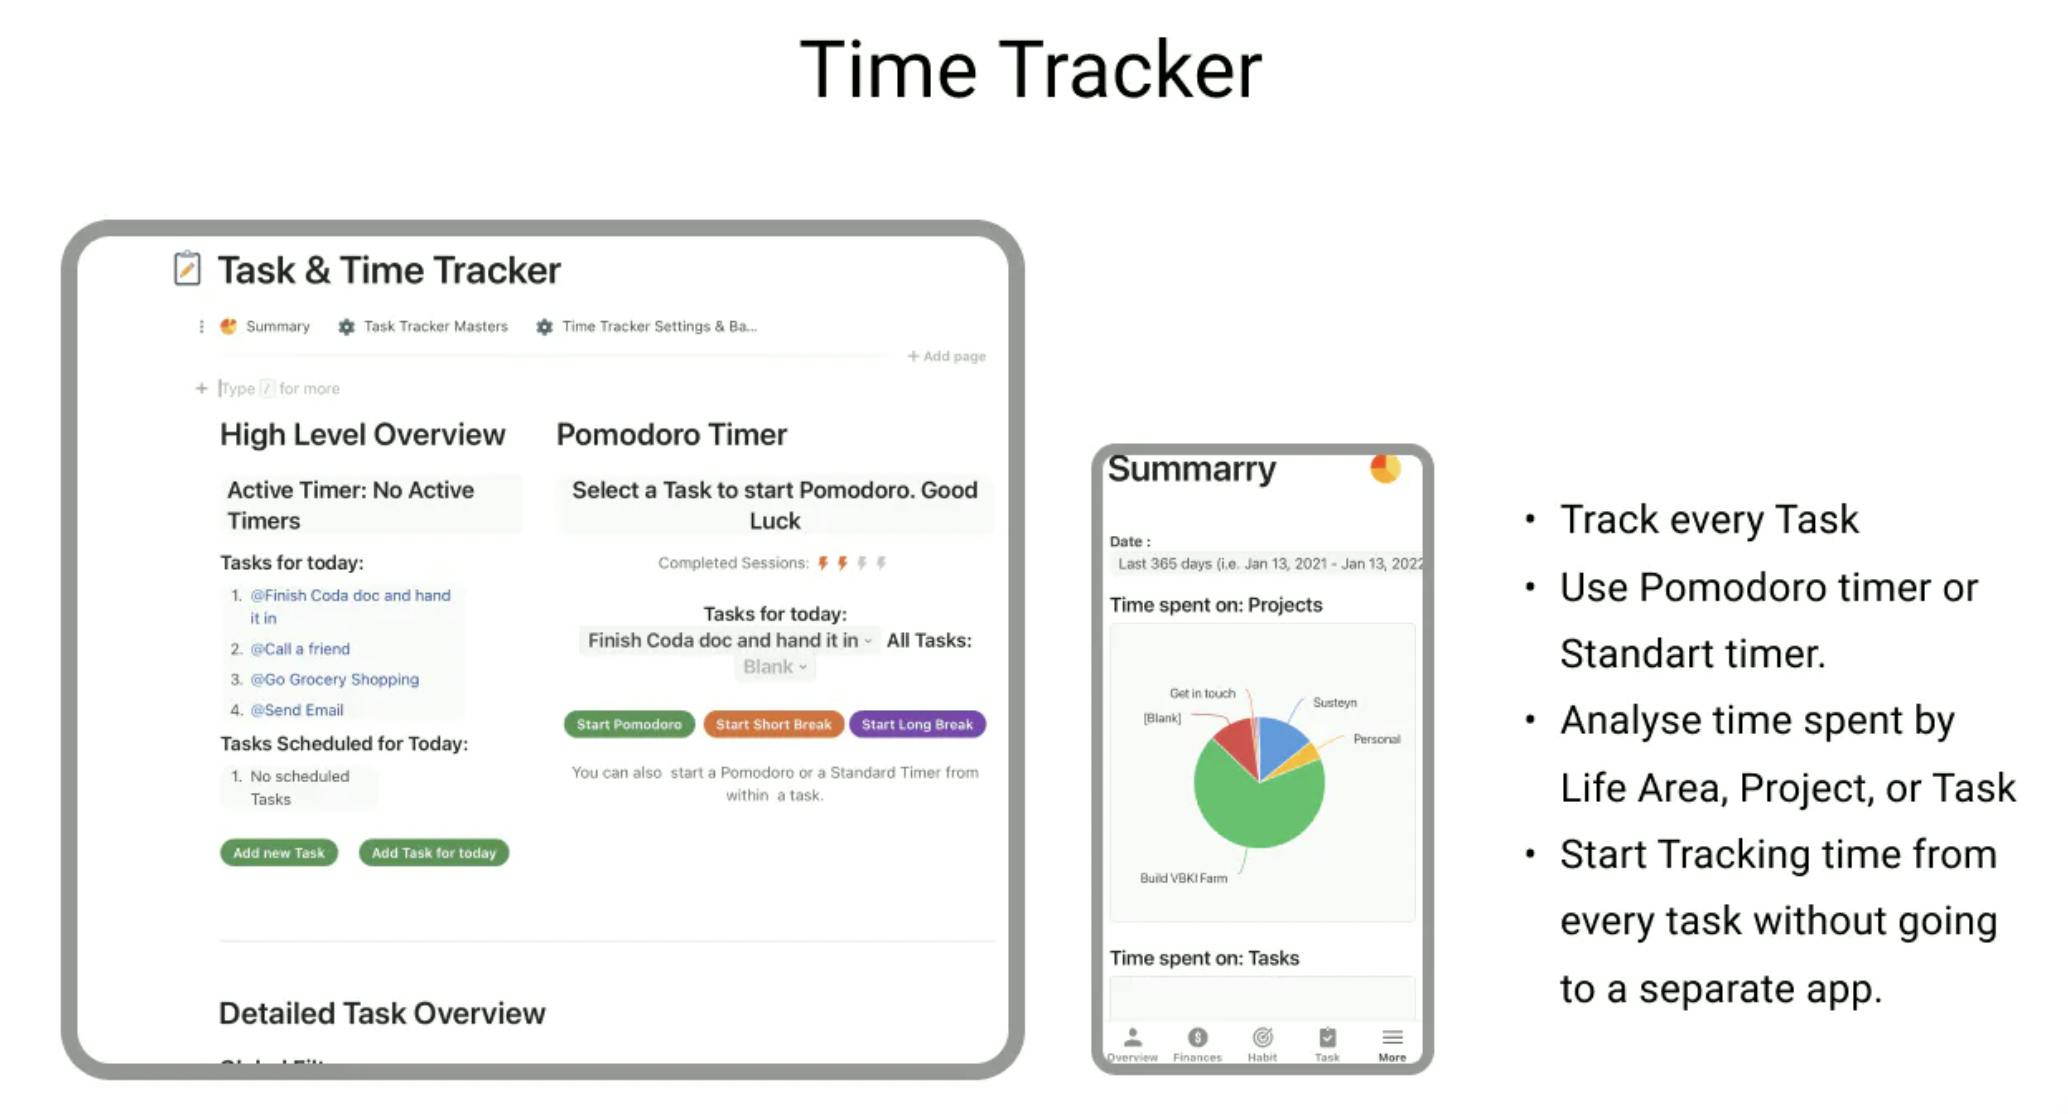
Time Tracker & Pomodoro Timer
Standart Timer
Pomodoro Timer
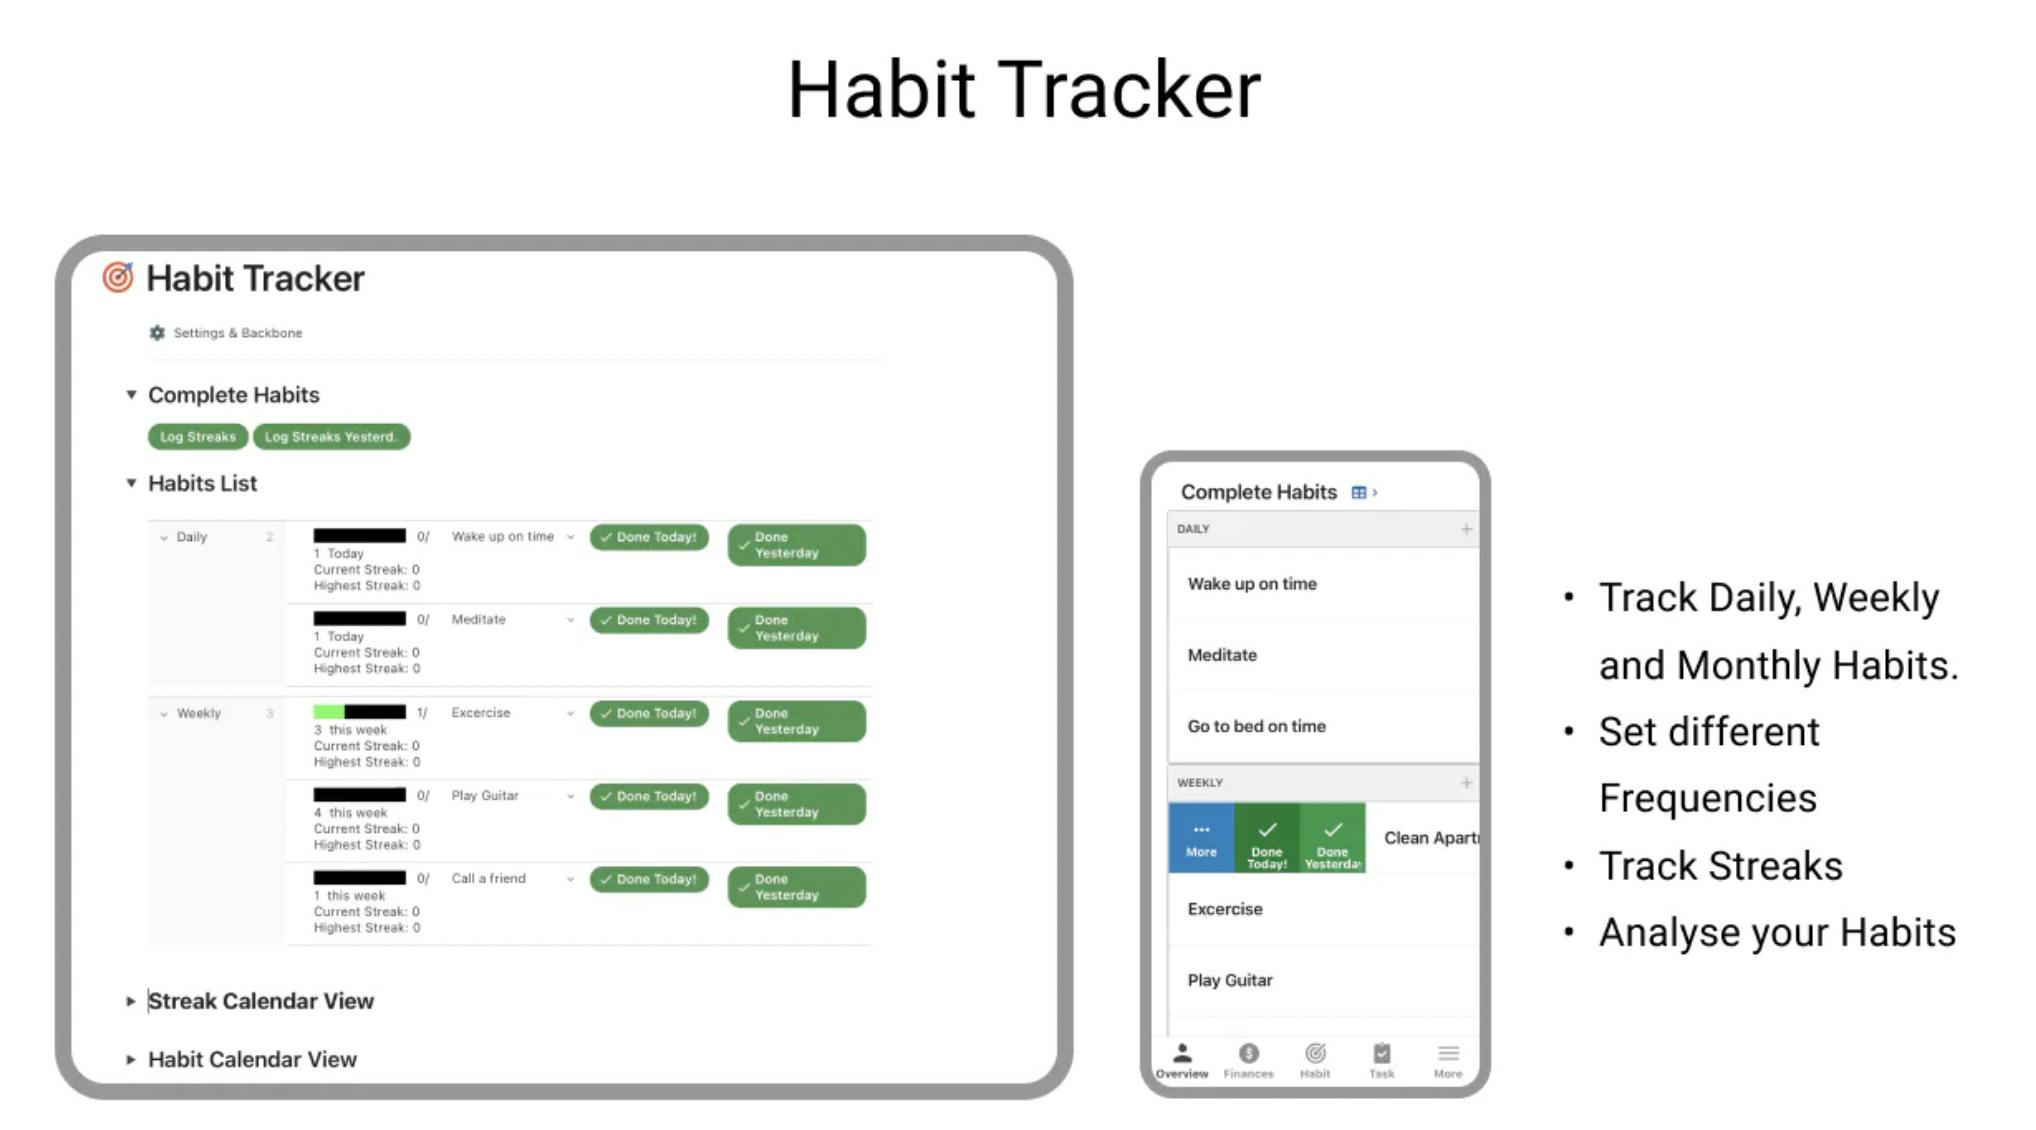
Habit Tracker:
Input:
Analysing data:
Settings and Backbone:
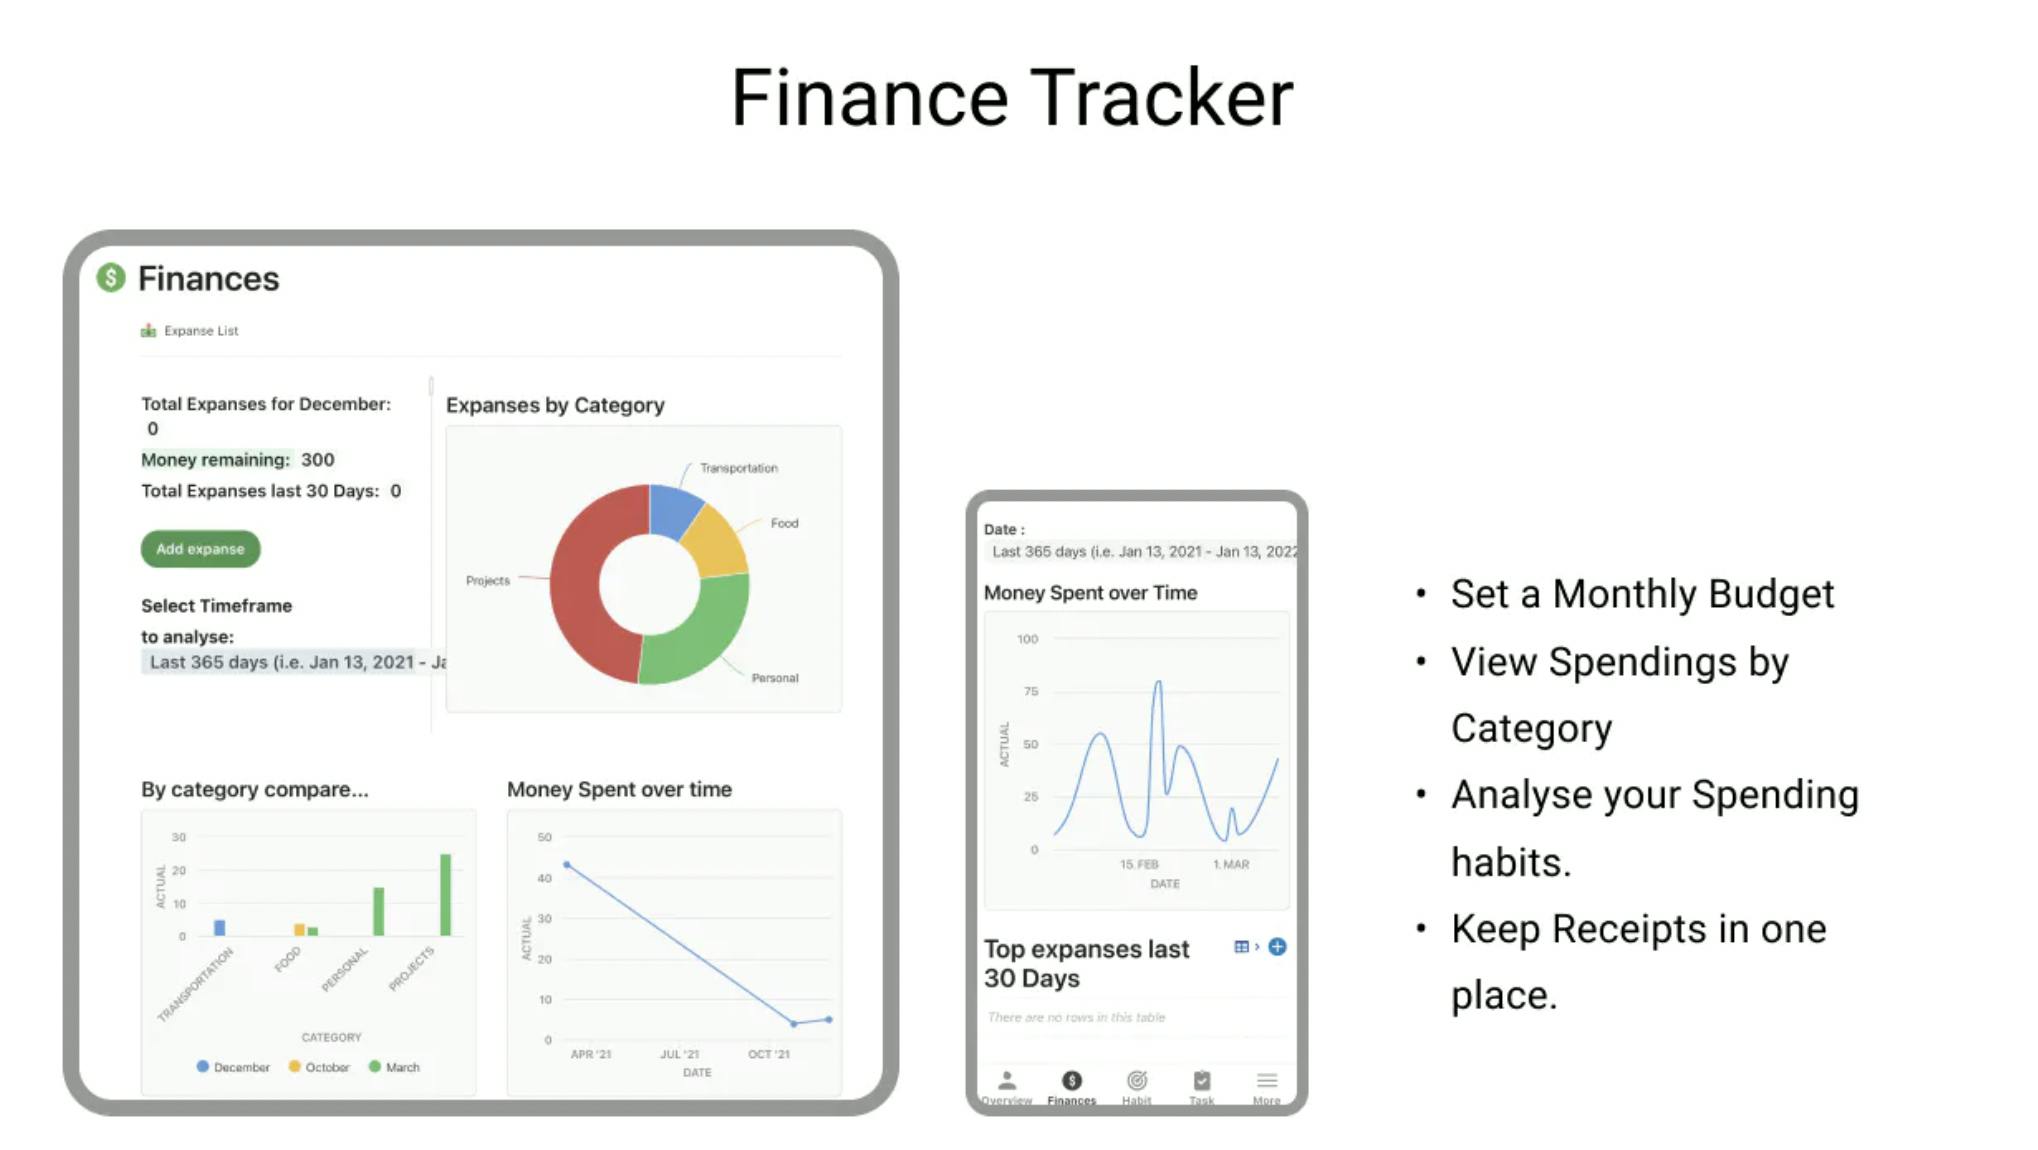
Finance Tracker:
Subscription Tracker
Want to print your doc?
This is not the way.
This is not the way.

Try clicking the ⋯ next to your doc name or using a keyboard shortcut (
CtrlP
) instead.